Building a Homelab with ARM Servers: A Low-Power, Scalable Solution for Experimentation and Learning
Introduction
What is an ARM Homelab? Well, imagine creating a cozy little tech sanctuary right in your own home, filled with gadgets that hum gently without sending your electricity bill sky-high. ARM servers have arisen as champions of low power consumption and affordability. I used to think that robust computing power was exclusive to those colossal x86 systems, but recent advancements in ARM processors genuinely changed my perspective. They can now tackle serious workloads and allow me to explore the vast universe of tech from the comfort of my living room.
Why Consider ARM for Your Homelab? As I delved deeper into the world of ARM technology, I was amazed to learn how far these processors have come! What started as humble engines powering smartphones and tablets has evolved into formidable server-grade options. Companies like Raspberry Pi and Pine64 offer fantastic single-board computers, while platforms like the Ampere Altra are making headway in professional circles. It feels like a revolution is brewing, and I cannot help but get excited about what’s in store for my homelab.
Benefits of an ARM-Based Homelab
- Energy Efficiency: ARM processors are like gentle giants; they pack a punch without guzzling energy. This means I can run my homelab 24/7 without losing sleep over mounting energy bills.
- Cost-Effectiveness: The affordability of ARM boards, such as the Raspberry Pi or RockPro64, has opened doors for many hobbyists (myself included!). These options leave traditional x86 server hardware in the dust when it comes to budget constraints.
- Scalability: As someone who loves tinkering, the prospect of easily expanding my ARM homelab by adding more single-board computers or mini-servers is incredibly appealing. The journey never really has to end!
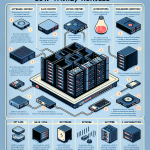
Popular ARM Options for Homelabs
1. Raspberry Pi 4
Specs: Quad-core ARM Cortex-A72 CPU, up to 8GB RAM, Gigabit Ethernet, USB 3.0.
Best For: I find this gem perfect for entry-level homelab projects, small web servers, IoT applications, and lightweight apps like Pi-hole or Nextcloud.
Pros:
- Highly affordable and backed by a vibrant community alongside extensive software support.
- It consumes very little power, making it perfect for 24/7 usage.
- The optimized Raspberry Pi OS comes with a plethora of guides and resources to help me along the way!
Considerations: Sometimes, I have to remind myself that limited RAM and processing power can restrict more resource-intensive tasks.
2. RockPro64
Specs: Hexa-core ARM Cortex-A72/Cortex-A53 CPU, up to 4GB RAM, Gigabit Ethernet, PCIe slot.
Best For: When I need just a bit more oomph than the Raspberry Pi, I turn to the RockPro64—it’s excellent for NAS and lightweight web hosting.
Pros:
- The PCIe slot means I can expand my hardware in fun ways.
- It’s a fantastic option for running ARM-based Docker containers with solid community backing.
- It’s surprisingly affordable compared to x86 hardware with similar capabilities.
Considerations: If you’re new to Linux, the limited support for mainstream OS options like Ubuntu Server may be challenging, but a little research and determination go a long way.
3. Odroid H2+
Specs: Although this model leans Intel, its ARM alternatives like the Odroid N2+ and Odroid HC4 have caught my attention with their quad-core ARM Cortex processors.
Best For: I adore this option for building small NAS or media servers and even multi-node Kubernetes clusters.
Pros:
- With good community support, I find these options provide solid processing capabilities over Raspberry Pi.
- Built-in SATA ports make it a breeze to set up lightweight NAS.
- Docker support thrives here, perfect for self-hosting various applications.
Considerations: Understanding that Odroid models vary significantly helps narrow down the performance I desire based on the selected model.
4. Ampere Altra-Based Servers
Specs: High-core ARM processors, with configurations featuring up to 80 cores in Ampere Altra CPUs.
Best For: Advanced users like me, seeking scalable ARM power for development and testing multiple VMs and containers, rejoice!
Pros:
- These high-performance ARM cores can rival even traditional x86 server CPUs, which is mind-blowing.
- Cloud providers like Oracle Cloud offer free ARM instances, making experimentation a cinch without the cost of hardware.
Considerations: Hardware costs can creep up higher than single-board computers, so exploring cloud instances becomes an appealing alternative.
5. Apple M1/M2 Machines
Specs: ARM-based Apple Silicon boasting high-performance cores and low energy consumption, a delightful combination.
Best For: If I’m looking for a powerhouse workstation that also doubles as a homelab, the M1 or M2 makes perfect sense, especially for Docker or Kubernetes.
Pros:
- Exceptional performance-per-watt ratio that keeps me smiling.
- Runs Docker seamlessly for local container development, opening endless possibilities!
Considerations: However, these options carry a higher price tag and limited customization due to Apple’s ecosystem, which gives some pause.
Setting Up an ARM Homelab Server
- Choosing the OS:
- Raspberry Pi OS: A lightweight Debian-based environment tailored for Raspberry hardware.
- Ubuntu Server for ARM: It provides a consistent user experience across ARM and x86 architectures, which is delightful.
- DietPi: An ultra-lightweight Debian fork, which I find beautifully optimized for ARM devices.
- Armbian: Community-driven and features versions based on both Debian and Ubuntu for a variety of ARM hardware.
- Essential Applications and Services:
- Docker: This is where the magic happens; I can run numerous ARM-compatible containers for services like Nextcloud and Plex.
- Kubernetes: With K3s or microk8s, managing containerized applications on Raspberry Pi clusters becomes a piece of cake.
- Pi-hole: My go-to network-wide ad blocker that fits seamlessly onto ARM devices.
- Home Assistant: This open-source server serves my IoT projects well, turning my house into a smart home.
- OpenMediaVault: With this, my ARM homelab transforms into a NAS for file sharing and media storage.
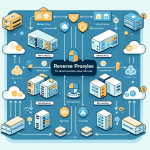
- Networking for ARM Clusters:
- Cluster Setup: It’s the icing on the cake! I link multiple ARM devices through a switch or router for a beautiful, low-power setup.
- Static IPs and DNS: Configuring static IPs and utilizing local DNS services streamline my access and make everything smoother.
- Power Management and Cooling:
- A multi-port USB power supply or a power distribution setup helps efficiently manage multiple boards.
- I can use simple cooling solutions like heat sinks, though more advanced configurations may be necessary for larger setups.
- Cost-Saving Tips:
- Use Second-Hand Hardware: I’ve found repurposing old devices like smartphones or tablets for basic tasks is a goldmine!
- Cloud ARM Instances: Certain providers extend free ARM instances or low-cost options, making experimentation a breeze.
- Check for Vendor Discounts: Promo deals from suppliers or local community sales can save a few bucks here and there.
As always, i’m thrilled to hear what you think about a ARM homelab and it’s comparison with x86,
Thank you for reading this post 🙂