Proxmox: The Ultimate Virtualization Platform for Your Homelab
In an era where cloud computing dominates, setting up a homelab is an exciting journey that offers hands-on experience with cutting-edge technology. One of the most compelling platforms to consider for your virtualization needs is Proxmox. Proxmox offers an intuitive and robust solution that caters to both users and enthusiasts alike.
Why Choose Proxmox for Your Homelab?
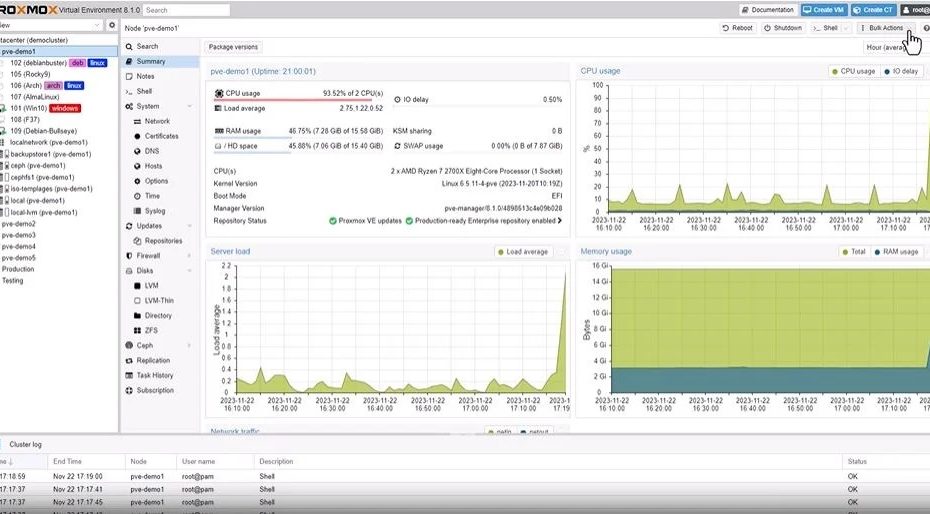
Proxmox is more than just a virtualization platform; it’s a comprehensive open-source tool that integrates both KVM for full virtualization and LXC for lightweight container-based virtualization. Here are some compelling reasons to consider Proxmox for your homelab:
- Ease of Use: Proxmox provides a user-friendly web interface that simplifies the management of virtual machines (VMs) and containers. This makes it accessible for beginners and powerful enough for advanced users.
- Versatile Virtualization Options: With Proxmox, you can utilize both VMs and LXC containers, allowing you to tailor your environment for various applications and services.
- Robust Features: The platform comes with essential features such as high availability clustering, which allows you to run multiple Proxmox nodes and share resources seamlessly.
Getting Started with Proxmox
Setting up Proxmox is a straightforward process, making it a perfect choice for users who want to focus more on experimentation rather than setup hurdles. You can quickly install Proxmox on any compatible hardware, as it supports a variety of processors and can run on minimal system requirements.
Here’s what you need to get started:
- Download the Proxmox VE ISO: Start by downloading the latest Proxmox VE ISO from the official Proxmox website.
- Prepare Your Hardware: Make sure you have at least a dual-core CPU with Intel-VT or AMD-V enabled, a minimum of 4GB RAM, and sufficient disk space.
- Boot and Install: Boot from the Proxmox ISO and follow the installation prompts. The installation process is straightforward and includes options for configuring network settings and storage.
- Access the Web Interface: Once installed, you can access Proxmox through your web browser at https://your-ip-address:8006.
After installation, you can start creating VMs and LXC containers based on your needs.
The Power of LXC Containers and VMs
One of Proxmox’s standout features is its support for both VMs and lightweight Linux containers (LXC). Each has its unique advantages:
- LXC Containers: These offer a lightweight alternative to VMs and are ideal for running multiple isolated applications on the same kernel. Containers start up much faster and consume fewer resources.
- Virtual Machines (VMs): VMs provide complete isolation of operating systems, making them perfect for testing various OS environments or applications that require a full-fledged operating system.
Proxmox’s architecture allows you to switch between VMs and containers seamlessly, which means you can experiment with both methodologies without locking yourself into one approach.
Testing Clustering and Storage Solutions
One of the advanced capabilities of Proxmox is its clustering feature, which allows multiple Proxmox nodes to function as a single entity. By creating a cluster:
– You can manage all nodes from a single web interface.
– You can easily migrate VMs and containers between nodes with no downtime.
– High availability setups can be achieved, ensuring that your services remain operational even if one node goes down.
Integrating Ceph as a storage solution is another great feature. Ceph provides distributed storage for your cluster, offering redundancy and scalability. Setting up Ceph with Proxmox ensures that your data is protected and accessible, making data loss a thing of the past.
Additionally, Proxmox includes a comprehensive backup service, allowing users to back up VMs and containers, restoring them easily in case of failure. This is crucial for any lab setup where testing can lead to unintended consequences.
Seamless Backup and Recovery
When you’re working in a homelab, mishaps are inevitable. Therefore, a robust backup strategy is essential. Proxmox simplifies this with built-in backup functionalities, which include:
– Automated backup schedules for VMs and containers.
– Incremental backups to save storage space.
– Restoration options to bring VMs back to a previous state with ease.
To create effective backups, you can configure storage settings to use local or network-attached storage. This flexibility allows you to tailor your backup strategy to your unique needs.
Community and Support
One of the most compelling reasons to use Proxmox is the supportive community that surrounds it. Users can turn to the Proxmox forums, documentation, and user-contributed content for troubleshooting, tips, and best practices. For additional information, you can check out:
– The official Proxmox Documentation: [Proxmox VE Documentation]
– Proxmox Community Forum: [Proxmox Community]
Both resources are invaluable when you’re just starting or if you’re looking to delve deeper into advanced configurations.
Conclusion
Proxmox is an exceptional virtualization platform that brings together flexibility, ease of use, and extensive features that make it suitable for anyone looking to explore the world of virtualization. Whether you’re a beginner or a seasoned professional, Proxmox provides a wealth of options for deploying virtual machines and containers, testing clustering setups, and leveraging powerful storage solutions like Ceph.
Feel free to share your thoughts or experiences with Proxmox in the comments below! We’re eager to hear how you integrate this powerful tool into your homelab.


