Recommended Homelab Hardware Setup: Building a Scalable, Efficient Infrastructure
Creating a homelab has truly been one of the most fulfilling journeys of my life as a tech enthusiast. You see, a homelab is more than just a collection of hardware; it’s a personal sanctuary where ideas come to life, and learning never stops. I find myself constantly excited about experimenting with new applications, testing configurations, and really diving deep into technologies that I’ve always wanted to explore.
As I sit down to share what I’ve learned about setting up a homelab, I can’t help but recall my own experience. It’s a bit like embarking on an adventure—the thrill of the unknown mixed with the comfort of having your own little world dedicated to tech. With the plethora of hardware options available today, finding the right setup can feel like both a challenge and a treasure hunt. So, if you’re curious about where to start, let’s embark on this journey together!
Why Build a Homelab?
Having a homelab has given me invaluable hands-on experience with a myriad of technologies—something that books alone just can’t offer. I often marvel at how much I learn from actually tinkering with hardware and software. It doesn’t matter if you’re an aspiring developer, a seasoned IT professional, or merely a hobbyist; there’s something magical about having your own space for hands-on experimentation.
Here’s why I believe building a homelab is essential for anyone serious about tech:
- Experimentation: Having a dedicated environment allows you to break things intentionally to understand how they work.
- Skill Development: Whether it’s networking, virtualization, or automation, you gain practical insights that curriculum alone doesn’t provide.
- Coding Practice: A homelab is an excellent space to test your coding skills. You can try out new applications without the pressures of a production environment.
This hands-on approach has taught me much more about IT concepts than any lecture ever could. Isn’t it fascinating how practical experience solidifies our understanding? I truly believe that if you’re looking to deepen your tech skills, a homelab is a fantastic investment.
Choosing the Right Hardware
Now comes the exciting part—selecting the right hardware for your homelab! This decision often comes down to several factors based on your unique needs and circumstances:
- Purpose: First, reflect on what you want to achieve. Are you diving into virtualization, exploring network security, or focusing on development? Understanding your goals can guide your choices.
- Budget: This can range anywhere from a modest investment to a significant financial venture. Be clear about how much you’re willing to spend.
- Power and Noise: Depending on your living situation, energy efficiency and noise levels are important. I’ve always leaned toward quieter solutions to avoid disturbances.
- Expandability: Think about the future—will your setup allow you to grow when your needs evolve? Choose hardware that can be expanded or upgraded easily.
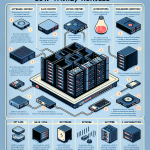
Recommended Core Components for a Homelab
So, what specific hardware do I recommend? Here’s what I’ve found invaluable:
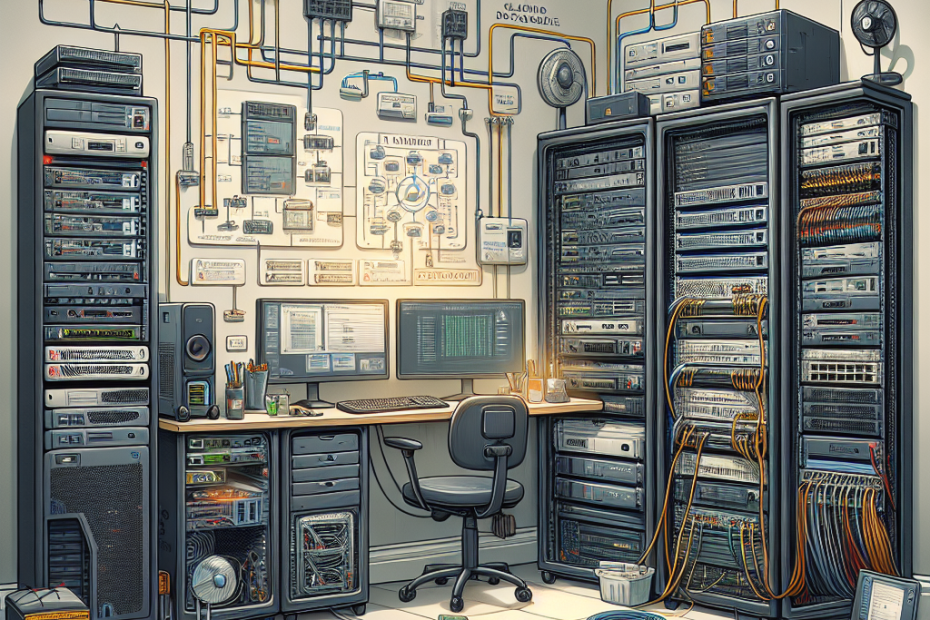
1. Server or Mini-PCs
In my experience, a dependable server is the backbone of any homelab. Here are a few options that have worked exceptionally well:
- Used Enterprise Servers: Consider products like Dell PowerEdge or HP ProLiant. They offer robust specs at reasonable prices! Just remember they can be power-hungry and noisy.
- Intel NUC or Similar Mini-PCs: If you’re limited on space, an Intel NUC provides a low-power solution without sacrificing performance.
- Custom-Built Desktops: Why not enjoy gaming while creating a homelab? A modern desktop build is versatile and can serve both functionalities seamlessly.
Key specs to look for: Multi-core CPUs are essential for virtualization. Aim for at least 16GB of RAM (32GB or more is even better!) and opt for speedy storage solutions like NVMe or SSD drives. Trust me; you won’t regret investing in quality here.
2. Network Equipment
Your network setup is just as critical as your server. You might want to consider:
- Router: Custom firmware support, like pfSense or OpenWrt, can really improve functionality. Brands like Ubiquiti and MikroTik have served me well.
- Switch: A managed switch allows for VLANs and traffic monitoring—critical for advanced configurations. I’ve found Ubiquiti UniFi and TP-Link to be reliable.
- Access Point: For those needing Wi-Fi experiments, look for options that support enterprise features, like Ubiquiti UniFi.
3. Storage Solutions
Reliable data storage can’t be overlooked. Here’s what I suggest for your homelab:
- NAS (Dedicated or DIY): Brands like Synology and QNAP are fantastic for out-of-the-box solutions. However, DIY options using TrueNAS can be just as effective!
- External Storage Drives: Having reliable external SSDs or HDDs for quick access is always a bonus.
- RAID or ZFS Options: Employing RAID configurations on NAS or ZFS on a server can be crucial for data integrity and redundancy.
4. Virtualization and Containerization Hardware
For effective virtualization, you’ll want specific hardware specs:
- CPU: Multi-core processors such as Intel Xeon or AMD Ryzen are game-changers for VM performance.
- RAM: I recommend at least 32GB of RAM; 64GB or more makes everything run smoother for larger environments.
- Network Interface Cards (NICs): A dual-port NIC enhances your network capabilities significantly.
5. Power and Cooling
Never skimp on power and cooling! A reliable setup can save you from unnecessary headaches:
- Uninterruptible Power Supply (UPS): This protects against outages. Brands like APC and CyberPower have served me well.
- Cooling Solutions: Invest in low-noise fans or liquid cooling to minimize distractions in shared spaces.
Recommended Hardware Setups by Budget
I know that budget plays a massive role in your setup options. Here’s how I would break it down:
Budget Setup (Under $500)
- Used server: Something like the Dell PowerEdge R710 can be a fantastic choice.
- Router: A basic consumer router flashed with pfSense or OpenWrt.
- Switch: Start with a basic unmanaged switch.
- Storage: An external HDD or SSD works great initially.
Mid-Range Setup ($500-$1500)
- Mini-PC or Intel NUC with 16GB-32GB RAM is perfect for virtualization.
- Consider a Ubiquiti EdgeRouter along with a managed switch.
- A Synology DS220+ or DIY NAS using TrueNAS can address your storage needs.
- And don’t forget a UPS for reliable power protection!
High-End Setup ($1500+)
- Custom-built server featuring AMD Ryzen, Intel Xeon, or high-core Intel i7/i9 processors.
- Advanced network with a Ubiquiti Dream Machine Pro and managed switch setup.
- High-performance NAS, like Synology DS920+ or a TrueNAS system, for extensive storage.
- Include a good UPS and robust cooling setup for a quiet environment.
Suggested Add-Ons for Homelabs
To supercharge your homelab experience, consider these handy add-ons:
- KVM Switch: A KVM switch makes managing multiple devices a breeze.
- Raspberry Pi: Great for lightweight and fun projects!
- USB Console Cable: Streamlines the configuration of your networking gear.
Feel free to share your experiences here in the comments below and thank you for reading this post 🙂